Friday, December 9, 2011

Chocolate Mint Sandwiches


I made these beautiful, rich cookies last year for my chocolate/mint loving family. I'm pretty particular about my chocolate and peppermint duos, for example, I don't like Peppermint Patties, Peppermint Bark or Junior Mints (sorry Kramer), Andes mints are...okay, Mint Chocolate Chip Ice Cream, now you're talking, Starbucks White Chocolate Peppermint Mocha--oh yeah and objectively speaking, these cookies were pretty awesome, the peppermint is not overpowering, it's mostly about the ganache  and chocolate glaze for me.

For the Cookies:
1 cup unsweetened Dutch-process cocoa powder
1/2 cup plus 2 Tbsp. flour
1/2 cup unsalted butter, softened
1/2 cup sugar
1 egg, room temperature
Confectioners' sugar, for the work surface

For the Ganache:
1/4 cup heavy cream
6 oz. semisweet chocolate, very finely chopped ( I just used chocolate chips)
3/4 tsp. peppermint extract

For the Glaze:
6 oz semisweet chocolate

1. Make cookies: Whisk together cocoa powder and flour in a medium bowl; set aside.  Put butter and sugar in the bowl of an electric mixer fitted with the paddle attachment.  Mix on medium-high speed until pale and fluffy, about 3 minutes.  Mix in egg until well blended.  reduce speed to low.  Add flour mixture; mix until just combined.  Divided dough in half, and shape each half into a disk; wrap in plastic.  Refrigerate until firm, about 1 hour (or overnight).

2.  Preheat oven to 350 degrees.  Transfer dough to a work surface lightly dusted with confectioners' sugar. Roll out dough to 1/8 inch thick.  Cut out cookies using a 2 inch round cookie cutter (you can see I used a small snowflake cutter); space 1/2 inch apart on baking sheets lined with parchment paper.  Repeat with remaining scraps of dough.  Bake cookies, rotating sheets halfway through, until firm, 10-12 minutes.  Let cool completely on sheets on wire racks.
  
3. Meanwhile, make ganache: Bring cream to a boil in a small saucepan over medium-high heat.  Add chocolate.  Cook, stirring constantly, until chocolate is smooth.  Stir in peppermint extract.  Let cool slightly, 10-15 minutes.

4.  Spoon 1 tsp. ganache onto the bottom of 1 cookie; sandwich with another cookie.  Repeat with remaining cookies and ganache.  Refrigerate until firm, about 10 minutes.

5.  Make glaze: Melt chocolate in a heatproof bowl set over a pan of simmering water, stirring constantly.  Let cool slightly.  Dip 1 flat side of each sandwich into melted chocolate to coat; gently shake off excess. Place sandwiches, chocolate side up, on wire racks set over baking sheets.  Refrigerate until set, about 15 minutes.  Sandwiches can be refrigerated in a single layer in airtight containers up to 2 days (2 days? Whatever, we had them for at least a week and they were fine, I did keep them in the fridge, because of the heavy cream).

Not gonna lie, these cookies were some of the most time consuming 
I've made, but it's kind of fun once a year to spend time in the kitchen 
making special treats. They really are beautiful.

I can't believe I didn't get a picture of the finished product! Thankfully Martha still has a link for hers, click here for the complete look.

Enjoy!

Coconut Macadamia Shortbread


This recipe comes from a 2005 Holiday Cookies magazine from Martha Stewart. I've been making them for a couple Christmas seasons now, and look forward to them all year. Coconut is one of those things, like cilantro, you either love it or hate it, I personally love both, so if you too are one of those coconut lovers out there, you might want to give these a try.

1 cup macadamia nuts (about 3 oz) toasted
3/4 cup plus 2 Tbsp. sugar
1 1/2 cups sweetened shredded coconut
3/4 cup plus 1 Tbsp unsalted butter, softened
4 Tbsp. cream of coconut or unsalted butter ( I have always used butter, I mean who has heard of cream of  coconut??)
2 tsp. pure coconut extract
2 cups flour, plus more for work surface
1/2 tsp coarse salt
1 large egg white, lightly beaten

1.  Preheat oven to 325 degrees. Process nuts and 2 Tbsp sugar in food processor until finely ground; set aside. Process 1 cup coconut until coarsely ground; set aside.

2.  Put butter, cream of coconut, and remaining 3/4 cup sugar in the bowl of an electric mixer fitted with the paddle attachment; mix on medium until pale and fluffy, about 2 minutes.  Mix in coconut extract.  Reduce sped to low.  Add flour, salt, nut mixture, and ground coconut; mix until combined.

3. Halve dough.  Shape halves into disks, and wrap in plastic.  Refrigerate until firm, about 1 hour.  Let soften before rolling.

4.  Roll out each disk on lightly floured parchment to 1/4 inch think.. Cover with plastic; refrigerate until firm, 30 minutes.

5.  Cut dough into squares using a fluted 2 1/4-inch square cookie cutter ( Use whatever you like, as you can see I used a heart cutter, snowflakes would be pretty cute too).  Reroll scraps; continue cutting out shapes.  Space about 1 inch apart on baking sheets lined with parchment.  Lightly brush tops with egg white; sprinkle with remaining 1/2 cup coconut.  Bake until golden, 20-25 minutes. Let cool on sheets on wire racks.  Cookies can be stored in airtight containers at room temperature up to 1 week (they also freeze great! We snacked on them for a couple months.).

 Before they go in the oven...

and after.  So delicious served with tea.

For a picture of Martha's square cookies in their cute paper cups click here.

Enjoy!

Thursday, December 8, 2011

Christmas Lights

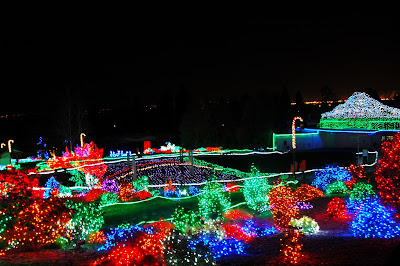
Like everyone, everywhere, we love getting in the car to go see the lights of the season. Here in Seattle we have several opportunities and these are just a few...

1) The most advertised of course is ZOO Lights at Point Defiance Zoo in Tacoma.


For ticket rates click here. You can pre-order, pay at the door or purchase at Fred Meyer.  Military and Pierce County residents may qualify for a discount as well as Zoo members.  There is a little cafe where you can order coffee and treats to keep you warm while you stroll through the park.  Get warmed up in the toasty aquarium, you may even want to treat the kiddos to a festive camel ride!

2) Last year we learned about Fantasy Lights. This is a park you drive through at less than 5 mph, the kids can get out of their car seats, open the windows, moon-roof, put the top down, there is even a radio station you can tune into to hear Christmas music played by a local high-school band. You can print out a $3 coupon from the Pierce County website. Expect a wait on weekends, and you may want to make a pit stop before entering the park. It's a fun, low key event, and don't forget to pack the car with cocoa and cookies!

3) Okay now I'm just searching the web, so these recommendations are not from personal experience. Garden d'Lights in Bellevue. Check out their website for directions, ticket rates, and even free admission nights! 

4) Clam Lights at Coulon Park runs nightly between 5-9pm with an annual kick off each season full of festivities ending with a visit from the Argosy Christmas Ship.

5) Speaking of which, the Argosy Christmas Ship. This was my first Christmas gift to Jeremy while we were dating. We had a fancy-ish dinner in downtown Kirkland, boarded at Carillon Point, cruised down Lake Washington passing lots of beautiful, lit-up homes including the Gates mansion. Once we got to Bellevue, our destination, we were greeted by a bay full of private yachts all decked out in Christmas lights--pretty cool.

6) Stanwood's The Lights of Christmas gathers more than 40,000 people each season and features 1.2 million lights, pony rides, Polar Express Train Rides, with the option of a gourmet Dinner Theater. I did not even know this existed 5 minutes ago...we have to go!

Other helpful links:

For a regional listing of private neighborhoods and individual homes click here. I grew up going to the Viewpointe at Redondo, a 44 home neighborhood.  One year there was even an open house for the public to attend, I remember getting cider and cookies, kind of a fun memory.

Candy Cane Lane for some reason gets a lot of hype, but we were pretty disappointed the year we went and my sister's family went last year and said it was a dud. My opinion--don't bother.

Kerry Park in Queen Anne keeps coming up, apparently a good view of the City Lights including the iconic Space Needle's Christmas Tree.

Enjoy!

Wednesday, November 30, 2011

O Christmas Tree

One of our first Christmases, we were on a budget and seeking adventure.  We learned about cutting your Christmas tree fresh out of the woods for $10--perfect! It involves stopping in at the ranger station on your way up to Snoqualamie Pass or Chinook Pass and buying a permit. They will give you maps and all the other details you need to know.

A couple things we learned...
1) You might want to bring a handgun, we were a bit on edge our first trip with all the feline tracks going every which way, bobcat or cougar--didn't really want to meet one.

2)  If you have 4 wheel drive or chains, you will probably get a prettier tree. We have never bothered with either and have always come home with a homely, but endearing Charlie Brown tree. The big trucks who can drive up higher come down with beautiful noble firs...jealous.

3)  The other tip my parents learned from our one-time tree-cutting experience, is when tying your tree onto the roof of your car, place it with the trunk at the rear, otherwise your tree will dry out in a week!

4) Lastly, if you happen to stop at North Bend for a quick lunch on your way home, do not put your brand new android phone on the tray with all your leftover wrappers, because it just might end with you digging through a Burger King dumpster at midnight...just saying.

It's a good little drive up the pass, I think you get off I-90 around Exit 37, 
it's either Asahel Curtis or Denny Creek.

These are extremely helpful if you have a pair.

 I think Jeremy has never felt more manly .

Eureka! Like I said homely, but endearing.

For the Forest Service's website click here, there is a Quick Link for "Christmas Trees" for additional tips on keeping your tree fresh as long as possible.  

Seattleites:
Snoqualamie Ranger District
902 SE North Bend Way
North Bend, WA 98045
(425) 888-1421

South Sounders:
US Forest Service Ranger Station
450 Roosevelt Ave E
Enumclaw, WA 98022
(360) 825-6585

All other offices and locations to purchase permits click here.

Happy Hunting!

Thursday, November 10, 2011

Harvest Banner


While we were on vacation in September, I started thinking about my front porch. I've never really done anything with it, and yet it has so much potential. I want my house to be welcoming the moment you pull into the driveway.  I didn't have much in my budget for it this year, so I knew I needed to make something and then, thanks to Pinterest I got my idea.

So here is my first attempt at a tutorial, which first involves a trip to JoAnns.

1. Shopping List:
1/3 yard solid cream outdoor canvas 
1/8 yard solid brown outdoor canvas
1/8 yard Pellon Wonder-Under Fusible Web 
Small spool of brown thread
2 yards of binding - you can use a double wide packaged binding. I bought a cream trim. Use whatever catches your eye.

2. On the computer:
Design your letters, and get creative with fonts. I chose High Tower Text since I was going for classic and old fashioned. As far as size of the letters, you want them to be around 4 inches tall. I think for High Tower that was between 300-400. Print (I always click the "Outline" in advanced settings, so as not to waste ink).

3. Make your triangle pattern. 
I cut mine out of a Digiorno box and it's 11 1/2 inches long x 8 1/2 inches wide.

4. Cut out your printed letters.

5. Iron the Wonder-Under onto the back of the brown canvas.

6. Trace letters onto Wonder-Undered canvas
Place letters face down (backwards), and trace.

7. Cut out canvas letters.

8. Cut out flags.
Using your cardboard pattern, cut out 7 flags. 

9. Iron letters onto flags.
Get out your craft ruler and center letters on flags, remembering to account for the 1/2 inch trim that will be sewn at the top.  Iron into place.

10. Sew around flags.
Thread your machine with brown thread. Set your stitch length to 3.0, I think a larger stitch looks more professional for top stitching. Sew quarter inch around sides of flags. At this point you may want to trim sides with pinking shears to add detail.

11. Sew flags together.
Pull out your trim, give yourself a foot or so of excess for hanging. You can pin trim to flags or just take it slow. As far as spacing the flags,  you could put a couple inches between each flag. For the size of my porch I butted them up so they were almost touching.

12. Iron the finished product and hang!


It does not feel like 12 steps, it's really simple and goes pretty quick once you start. And of course you could make one for any season or holiday, changing fabrics, words, lettering...have fun with it!

Sumner

As the holidays approach, I get anxious to visit the Main Street shops in Sumner. One of our traditions we look forward to each year is attending the Autumn Evening Open House. The downtown shops stay open late and serve all kinds of cookies, candies, doughnuts and cider. It's a fun event to attend with your family, girlfriends, or even husbands who love all the treats! We still have yet to make it to The Old Cannery's Bridge Lighting during Thanksgiving weekend, with cider, coffee, roasted nuts and kettle corn ... maybe this will finally be the year!


 My favorite store and interior decorating icon. Check out their blog.

 One of the classiest paper stores around.

 I love their generous and elegant selection.

Autumn Evening is the same night as the 
Scarecrow Celebration Contest who perform every half hour. 

The Old Cannery a few blocks from town is worth a visit, boasting 10 acres of furniture sold at low prices; a Fudge Factory with 24 flavors including sugar-free options; 7 scale miles of overhead G scale trains; and during their Hometown Holidays, free pictures with Santa and Sleigh Rides.


For a listing of Sumner's year round events, click here.

Wednesday, November 9, 2011

Glazed Pumpkin Bread


One of my favorite indulgences this time of year is fresh from the oven Pumpkin Bread. This recipe was the first one our family tried years ago, torn out of a Family Fun magazine and it continues to be my favorite. It is so simple to make and sure to please the whole family.

Bread
In mixer, beat until well combined:
2 cups (16 oz) canned pumpkin
3 cups sugar
1 cup water
1 cup vegetable oil
4 eggs
(Careful, it's a lot of liquid for your mixer to take, start on low.)

In separate bowl, whisk and add to pumpkin mixture:
3 1/3 cups flour
2 tsp. baking soda
1 tsp. salt
1 tsp. baking powder
2 tsp. cinnamon
1/2 tsp. nutmeg
3/4 tsp ground cloves

Beat 2 minutes. Divide between two greased and floured (I just use pan spray) loaf pans. Bake at 350 degrees for 60-70 minutes or until toothpick comes out mostly clean (but still a little soft) in center. Cool 10 minutes. Remove from pans.

Some Tips:

  • Set your first timer for 30 minutes, rotate pans. Then check in 15, 10, 5 minute increments until bread is almost, but not fully firm in center. 
  • Bake on lower middle oven rack. I learned this from my America's Test Kitchen Baking Book. It helps the bread cook more evenly without getting too brown on top.
  • A new thing I'm trying is baking breads and cakes at 325 degrees instead of 350. My husband's Aunt told me about this trick, which helps things rise slowly, cook evenly and yields a moist, dense bread or cake.
  • For quick breads, I use 1 large bread pan, like this Wilton Aluminum Loaf Pan instead of 2 traditional 9x5 loaf pans. I learned about these amazing pans when I baked for Olympic Coffee Roasters. You get more center pieces, which we all know are the best!

 Glaze
I use two different glazes depending on my mood.

Cinnamon Sugar Glaze
2-3 cups powdered sugar
1/2 tsp. ground cinnamon
2-3 Tbsp. warm water

Whisk powdered sugar and cinnamon in a bowl, add 1 Tbsp water at a time until desired consistency is reached. I like a thick glaze that stays on the bread. Drizzle over cool bread, if it's too warm, the glaze will just run off onto the counter.

Vanilla Glaze
1/2 cup sugar
1/4 cup water
1 tsp. vanilla

Combine in saucepan. Boil for 3 minutes. Poke warm bread and brush slowly with glaze allowing to seep into the holes.


For more nutrition and seriously no difference in taste or texture, 
I've been using this awesome whole wheat flour 
from Wheat Montana. It's a fine sift, non GMO, great product 
with 6 grams of protein and 6 grams of fiber per 1/4 cup!
I buy this 5lb. bag at Super Wal-Mart for around $4.50.
It's also cool, cause it reminds me of my sister Angie, from Montana. 
There is actually a Wheat Montana Bakery in her hometown--lucky.

Enjoy!

Wednesday, November 2, 2011

Pike Place Market

Pike's is probably the most touristy thing you can do in Seattle, but it's for a reason--it's awesome and uniquely ours. I remember my British Uncle Jeremy who had traveled on business around the world saying "It holds it's own"...in a good way, either way, it's something you have to see whether you're here for a week or a weekend.  The famous Pike Place Fish gather quite the crowd for their flying performances with each purchase. There's the boquet vendors, the locally grown fruits and vegetables, the many street performers and artists, the signature Market Spice Tea, bakeries, pubs, burgers and asian cuisine. Then there's the lower levels which can be pretty...weird.  There's a very unique smell that exists there, so 1st trimester moms, beware.  We love to get a bag of freshly made cinnamon doughnuts from the Daily Dozen Doughnut Company with their notorious "God sees when you don't tip" jar--threatening, but honest. And don't forget to walk across the cobblestones to the Post Alley side of the market. It's impressive how many ethnic flavors are available in a one block radius. For a cheap eat, try one of the creative combinations at The Crumpet Shop. Sample the Flagaship cheese at Beecher's. Order "your" drink at the original Starbucks that changed the world. Come back for a special dinner at Campagne if you like expensive, delicate, french cuisine or one of our favorites The Pink Door with no sign, just a pink door. Your tummy is not big enough to try everything your eyes want so choose wisely. 


 The market is a great place to buy hard to find fruits and vegetables.

Bring some chewing gum to leave a part of yourself at the Gum Wall. 

 Jeremy found this little gem of a piece at Post Alley 
and wanted to remember it forever.

I thought we had more photos...you can always search Google Images, but hopefully you will just get a chance to see it in person!   

Tuesday, October 18, 2011

Whidbey Island

Whidbey is one of my favorite islands in the Sound.  Deception Pass was one of the first day trips my family took when we moved here from California, and years later we discovered the quaint little coastal towns of Langley and Coupeville. Whidbey is the largest island in Washington and 4th largest in the lower 48 states. It's known history dates back to 1792 when it was first discovered by Joseph Whidbey and Peter Puget. Later settled by Isaac Ebey, a potato and wheat farmer who rowed daily across the inlet to work as Postmaster for Port Townsend...busy guy. The north end of the island's economy is cultivated by the Navy base and home to many military families, while the south end is marked by tourism and home to many working artists, writers, musicians and performers. Penn Cove, famous for it's Mussel Farm offers 27 varieties of freshly harvested shellfish...if you're into sort of thing. If you're a NW gardener, keep your eyes open for all the independent nurseries, my mom particularly likes Cultus Bay. And if you're a pizza lover (who isn't??), you gotta check out Langley's Village Pizzeria and get the Sicilian Crust.

Your tummy will be so full when you leave. 

 Downtown Coupeville's main street is lined with shops and restaurants, 
such as the craveable Knead and Feed.


 Jeremy and I have gotten to bike the trails at Fort Ebey a couple times, 
the Bluff Trail is the most scenic we've ridden yet, 
also great for walkers, this is must for any Washingtonian.

 Killing time, taking photos while Jeremy got the bikes ready.

 Got in some Disc Golf at the newly constructed Fort Nugent Park.


 Walking the Beach


 Keep your eyes open for wildlife

 A cheerful little chipper at our campsite.

Whether you've been here or not, I hope you will get to spend some time on this island gem. Enjoy! 
Tuesday, October 4, 2011

Cama Beach State Park - Camano Island

As winter approaches we have to get creative about weekend getaways since tent camping and hotelling it are not really an option. A few years ago I learned about the newly renovated cabins at Cama Beach State Park on Camano Island. We were pretty stoked to stay in a cabin with electricity for $17/night! (We later learned that there had been a pricing error, and the next year rates went up considerably, ranging now between $49-$159/night.) Formerly a private fishing resort until 1989, the park holds: 33 facilities ranging from Standard Cabins to Deluxe Bungalows, a very clean community bathroom and even the educational Center for Wooden Boats. The beach, known for it's clamming and crabbing, looks across the Saratoga Passage to the beautiful Whidbey Island in the distance.

 Such friendly little cabins.  Ours was conveniently located directly in front 
of the bathrooms, which came in handy for being in my third trimester!

 I was not expecting a sink, microwave and refrigerator... 
what a welcome surprise!
Click here for more pictures.

The vintage fill up station at the north end of the park. 

We did not get a chance to visit the Camano Island Coffee Roasters, but we did a drive-by and it looked pretty cool. We instead hit Blackbird Bakery Cafe in Stanwood on our way out of town. I think they served Zoka or Cafe Vita...anyway, it was a cute little shop with glowy lanterns in the windows. 

Camano Island is one of the lesser populated and developed islands in the Sound, with 56 miles of pristine beach and conveniently attached to the mainland by a bridge. This is a close-to-home vacation destination, which you will leave more refreshed than when you came. Happy Clamming!

Wednesday, September 28, 2011

Ferndale

Last October we had the opportunity to spend a blustery weekend up north on my In-Law's boat. It had been docked all summer in the cutest little private marina in Ferndale. A small town, just north of Bellingham, rich with farmland and a few other unexpected interests.


a newly paved trail through town.

 Saturday morning Farmer's Market. One vendor offers freshly prepared
breakfast sandwiches, while Barb's Pies and Pastries, the local bakery
serve the most adorable individual pastry pies.

 This historical museum park was such a treat to walk through, 
especially for us West Coasters who rarely get to see 
100 year old homesteads.

 For a unique small wedding, you can actually rent the church 
for your big day.  Click here for more details.


 Summer and School Tours offer children an opportunity to learn how 
to be a pioneer kid including: dipping candles, grinding grain, gathering 
eggs, visiting a one room schoolhouse and learning how mail was delivered.

We got coffee here on our way to Lynden, one of my favorite towns for 
another post.  Get that cozy feel of a rustic lodge for a 3 dollar coffee...
that's a pretty good deal.  Coffee itself is of typical franchise caliber, 
not Capitol Hill, but it gets the job done.